top of page
Blog Home
FHF.blog.header.png
Search

It's the start of a new year, and I'd say it's a start that most of us have been longing for for many months. I don't know about you, but I love the idea of a fresh start. The process of looking back at the year prior, taking stock of where you are and what comes next... there's just something very rejuvenating about it.


In addition to going through this process for myself and my family, I'm also thinking about it in terms of design. What trends will stick around next year, and what will fade out? I'm certainly no mind-reader, but I have a few predictions for what we might see this year:


1) We'll swap shiplap for other trimmed accent walls


Joanna made us all go crazy for shiplap over the past 5 years, but the trend seems to be losing steam. I think we'll continue to see accent walls using wood trim, as well as continued use of millwork and anything that makes a home feel "custom".


2) We'll see less farmhouse, more cottage


The pandemic gave all of us a need for a cozy, warm space to feel safe and protected, as well as a mass exodus from expensive & crowded metropolitan areas. This, combined with the death of the farmhouse aesthetic (see point above), will draw folks toward the cozy, calm style of cottage furnishings.


3) We'll leave our sea of gray behind for warmer taupes and tans, and continued use of jewel tones


Paint preferences of the past few years have trended towards cool tones - grays & blues. As we've seen a re-emergence of jewel tones this year I think we'll also start to see the tone of neutrals skew warmer to complement.


4) Vintage & antiques are here to stay


Facebook Marketplace finds, thrifting/antique stores, and "upcycling" are all here to stay. This ties in with trend #8 below, and an overall desire for more quality furniture.


5) White kitchens are out


All of that pandemic cooking means lots of pandemic cleaning, and all those folks with fully white kitchens are starting to regret their choice. My rust-colored countertops are not cute (and they will definitely be replaced someday), but they don't show a speck of dirt.


6) We'll see a resurgence of traditional, less open concept, floor plans


This is another result of our new pandemic lifestyle, where the family seems to be together all. the. time. I think we'll see a renewed interest in having separate, distinct spaces for each activity rather than a fully open (and noisy) main floor.


7) We'll continue to see a desire to bring the outdoors in, using earth tones & plant-life


Earth tones were big in 2020 and I expect them to continue in 2021. So were gardens, plant-babies, and anything else organic. This feels like a combination of another pandemic trend of the outdoors as a respite when so many indoor gathering places are off-limits, as well as continued growth and interest in sustainability and "boho" styles.


8) A decrease in "fast furniture", and an increase in purchasing from local craftspeople


This is the prediction I am most excited to see take shape, and I really hope it holds true. With a renewed interest in supporting local & small businesses as a result of a pandemic, as well as getting more use out of our furniture from being at home, I think we'll see places like Ikea, Wayfair, and Amazon be less desirable for furniture purchases. People are looking for more quality pieces that last longer and are more equitably made, and I expect with technology such as Facebook Marketplace and NextDoor, craftspeople will be able to reach broader local audiences to sell their goods.


This back hallway is the entrance we use the most often, and I've longed for making it more functional (& beautiful) for all of our comings & goings. I've also always wanted some board & batten - and this seemed like a great excuse!


I had a few goals before starting the space:

1) Brighten up the space by re-painting the entire hallway

2) Distract from the (not so cute) tile floors

3) Add storage with a shoe cabinet, coat hooks, key hooks, and a bench. The bench hasn't happened yet... but it's still in the plans!


BEFORE:


So here's the breakdown of how we went from the green monster to hallway full of character and & charm.


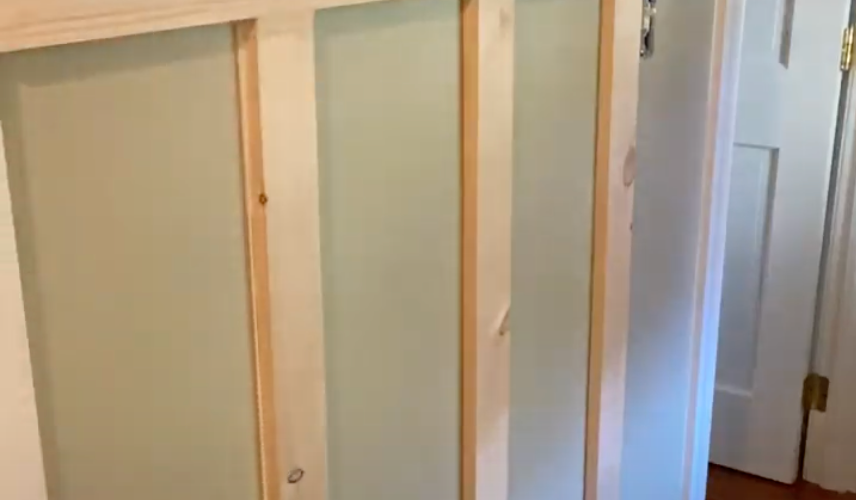
HOW TO DIY A BOARD & BATTEN WALL


What you'll need:

  • Blue tape

  • Pine boards (or MDF if you choose) - we used 1x3s and 1x4s

  • Liquid nails (we chose the "interior projects" kind since its easier to remove if we ever want to)

  • Nail gun

  • Sander

  • Plastic wood/wood filler

  • Spackling paste and/or joint compound

  • Caulk

  • Rags

  • Paint


Determining your measurement & materials:

Modern board and batten rarely uses the "board" part of the name - most people just put the battens directly onto the drywall, which is precisely what we did too. Start by using your blue tape to determine where you'll put your battens. Figure out the height of the horizontal batten first and then determine the distance between each vertical batten. There's not real "standard" measurement between your battens - so do what works for you. Mine are about 12in apart, but I made some adjustments for existing light switches and outlets - nobody wants to cut around outlets!


Once you have your measurements, head out & buy your materials. We chose to use standard pine boards - 1x4s for the top horizontal pieces, and 1x3s for the vertical battens. The few shelves or "caps" I did are also a mix of 1x4s and 1x3s.


TIP: If you don't want to do as much sanding or finishing of the boards, you could spring for the premium pine boards


Measure, cut, repeat

  • Measure & cut your horizontal battens first.

  • Once cut, sand them well before installing.

  • You'll want to make your studs so that at least some of your nails go into a stud - this will make the overall structure more secure.

  • Make sure you use a level as you're installing - placing it on the top of each batten and marking accordingly.

  • Apply liquid nails in an "S" shape on the back of the board, and then press against the wall.

  • Drive your first set of nails into the stud, and then in other portions, angle your nails alternatively up and down as you shoot them into the wall. This creates more "grab" than shooting the nails straight.

  • Once all of your horizontal pieces are installed you can start on the verticals.

  • Measure each batten individually to determine if you can cut all your vertical battens to the same length. We ended up cutting ours to the longest length and then trimming as necessary.

  • Give em' a good sand and then install the same way as the horizontal ones.

  • If you want a small shelf on top of any of your pieces, measure, cut & install the same way - laying the board flat against the 1in. portion of your horizontal batten.

Caulk, fill nail holes, & align seams

  • You'll want to caulk all the seams between the new battens and the wall. Using a steady hand, run a line of caulk down the gap between the pine board and the wall. Then using a damp rag, push & smooth the caulk into the seam. Don't forget to do the tops and underneath each shelf.

  • Fill nail holes with plastic wood and/or spackle. Once dry, sand smooth.

  • Depending on how aligned your seams between your vertical and horizontal battens are, you'll probably need to use some spackle or joint compound to even out the spot where the vertical batten meets the horizontal batten. I started with plastic wood and then ended up using joint compound on some spots.

  • Once all the wood filler, spackle & joint compound is dry, sand everything smooth.


Painting & finishing

  • You'll definitely need to prime since these are fresh boards. Sand with 220 grit in-between each coat of primer, and 2 at least two.

  • Use a semi-gloss paint for all of the board & batten, the same as you would for window trim, moudling & doors. It's more durable than matte or eggshell, and it makes it look more professional.


And that's it! That is how we build our board & batten in the hallway, and we couldn't be more pleased. I'll leave you with some final thoughts/tips in case you decide to take on this project:


  1. It will take longer than you think. Trust me.

  2. If it's a smaller area (like a hallway or bathroom), consider using MDF instead of pine board. It has a smaller profile so it doesn't stick out into the room as much.

  3. Use your electric sander to get seams smooth & in between coats of primer. We found that when we primed the boards the grain "popped", which isn't uncommon for fresh wood, but it was annoying to try to sand smooth. I didn't want to deal with the dust of bringing the sander in, but I wish I would have.

  4. Paint the walls first. Although you'll still have to repaint once the boards are installed - I wish I had painted behind them first. It was annoying to get between every board - especially in the places where my roller wouldn't fit.

  5. If you can swing it, go for the premium pine. Ours turned out fine but it took 3-4 coats of our white paint on the boards before the grain & knots were completely covered, which was a bit of a pain!


It’s that time of the year! The Nordstrom Sale runs annually this time each year, and its the only time of the year where a substantial amount of brands go on sale all at the same time. If you’re craving a closet refresh, looking to freshen up a few home items, or even just restock on beauty & self-care essentials, then set you calendars.


Here is the deal for access this year...


But the good news? They have all of the items up for preview this year - so you can start adding everything to your cart and checkout when the sale opens for you.


I’ve gone ahead and rounded up my favorite picks per category, to hopefully give you a bit of guidance on the overwhelming amount of items. Please note that these are affiliate links, which means I will earn a small commission for each purchase made through the links below (at no additional cost to you!). But I think since I found them for you that’s a fair deal...am I right? Let’s do it!


Home Decor


Beauty & Skincare


Women's Clothing


Outerwear


Shoes


for the gram...

bottom of page