diy board and batten
- Morgan Whitten

- Nov 22, 2020
- 4 min read
This back hallway is the entrance we use the most often, and I've longed for making it more functional (& beautiful) for all of our comings & goings. I've also always wanted some board & batten - and this seemed like a great excuse!

I had a few goals before starting the space:
1) Brighten up the space by re-painting the entire hallway
2) Distract from the (not so cute) tile floors
3) Add storage with a shoe cabinet, coat hooks, key hooks, and a bench. The bench hasn't happened yet... but it's still in the plans!
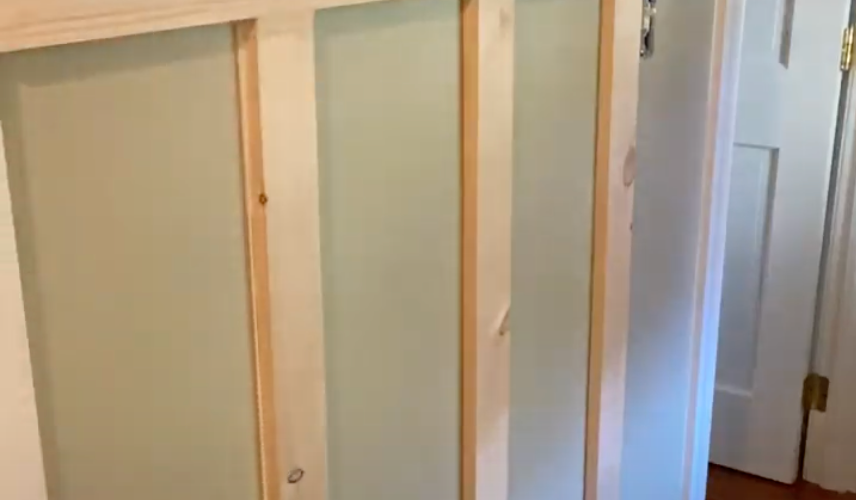
BEFORE:


So here's the breakdown of how we went from the green monster to hallway full of character and & charm.
HOW TO DIY A BOARD & BATTEN WALL
What you'll need:
Blue tape
Pine boards (or MDF if you choose) - we used 1x3s and 1x4s
Liquid nails (we chose the "interior projects" kind since its easier to remove if we ever want to)
Sander
Plastic wood/wood filler
Spackling paste and/or joint compound
Rags
Paint
Determining your measurement & materials:
Modern board and batten rarely uses the "board" part of the name - most people just put the battens directly onto the drywall, which is precisely what we did too. Start by using your blue tape to determine where you'll put your battens. Figure out the height of the horizontal batten first and then determine the distance between each vertical batten. There's not real "standard" measurement between your battens - so do what works for you. Mine are about 12in apart, but I made some adjustments for existing light switches and outlets - nobody wants to cut around outlets!
Once you have your measurements, head out & buy your materials. We chose to use standard pine boards - 1x4s for the top horizontal pieces, and 1x3s for the vertical battens. The few shelves or "caps" I did are also a mix of 1x4s and 1x3s.
TIP: If you don't want to do as much sanding or finishing of the boards, you could spring for the premium pine boards
Measure, cut, repeat
Measure & cut your horizontal battens first.
Once cut, sand them well before installing.
You'll want to make your studs so that at least some of your nails go into a stud - this will make the overall structure more secure.
Make sure you use a level as you're installing - placing it on the top of each batten and marking accordingly.
Apply liquid nails in an "S" shape on the back of the board, and then press against the wall.
Drive your first set of nails into the stud, and then in other portions, angle your nails alternatively up and down as you shoot them into the wall. This creates more "grab" than shooting the nails straight.
Once all of your horizontal pieces are installed you can start on the verticals.
Measure each batten individually to determine if you can cut all your vertical battens to the same length. We ended up cutting ours to the longest length and then trimming as necessary.
Give em' a good sand and then install the same way as the horizontal ones.
If you want a small shelf on top of any of your pieces, measure, cut & install the same way - laying the board flat against the 1in. portion of your horizontal batten.
Caulk, fill nail holes, & align seams


You'll want to caulk all the seams between the new battens and the wall. Using a steady hand, run a line of caulk down the gap between the pine board and the wall. Then using a damp rag, push & smooth the caulk into the seam. Don't forget to do the tops and underneath each shelf.
Fill nail holes with plastic wood and/or spackle. Once dry, sand smooth.
Depending on how aligned your seams between your vertical and horizontal battens are, you'll probably need to use some spackle or joint compound to even out the spot where the vertical batten meets the horizontal batten. I started with plastic wood and then ended up using joint compound on some spots.
Once all the wood filler, spackle & joint compound is dry, sand everything smooth.
Painting & finishing
You'll definitely need to prime since these are fresh boards. Sand with 220 grit in-between each coat of primer, and 2 at least two.
Use a semi-gloss paint for all of the board & batten, the same as you would for window trim, moudling & doors. It's more durable than matte or eggshell, and it makes it look more professional.
And that's it! That is how we build our board & batten in the hallway, and we couldn't be more pleased. I'll leave you with some final thoughts/tips in case you decide to take on this project:
It will take longer than you think. Trust me.
If it's a smaller area (like a hallway or bathroom), consider using MDF instead of pine board. It has a smaller profile so it doesn't stick out into the room as much.
Use your electric sander to get seams smooth & in between coats of primer. We found that when we primed the boards the grain "popped", which isn't uncommon for fresh wood, but it was annoying to try to sand smooth. I didn't want to deal with the dust of bringing the sander in, but I wish I would have.
Paint the walls first. Although you'll still have to repaint once the boards are installed - I wish I had painted behind them first. It was annoying to get between every board - especially in the places where my roller wouldn't fit.
If you can swing it, go for the premium pine. Ours turned out fine but it took 3-4 coats of our white paint on the boards before the grain & knots were completely covered, which was a bit of a pain!


Comments